Downhill 3 Bike: A Designer's Take on Action Sports Embroidery
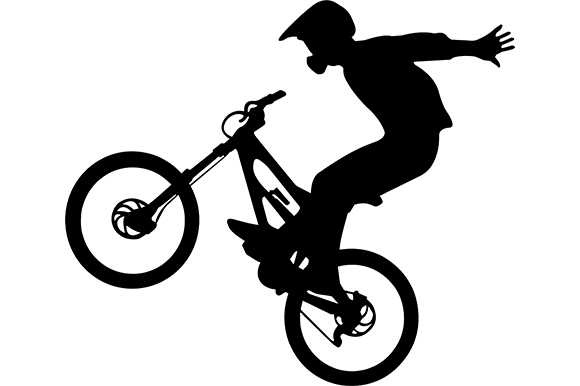
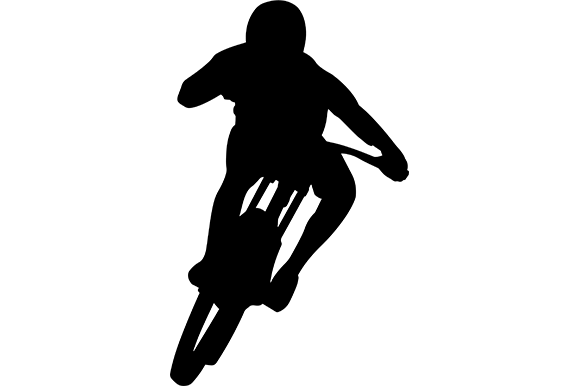
When I first pulled up the Downhill 3 Bike file on my screen, I wasn't just looking at a graphic; I was immediately visualizing the stitch-out. As someone who spends hours tweaking density maps and testing stabilizers, my first impression is always about potential. Does this design have the structural integrity to hold up on a heavy sweatshirt? Will the lines remain crisp on a textured tote bag? This specific asset, categorized under Illustrations and Graphics, presents a dynamic silhouette that screams motion. It captures that adrenaline-fueled moment of a rider leaning into a turn, which makes it an incredibly strong candidate for niche apparel and lifestyle products.
Visual Personality and Project Fit
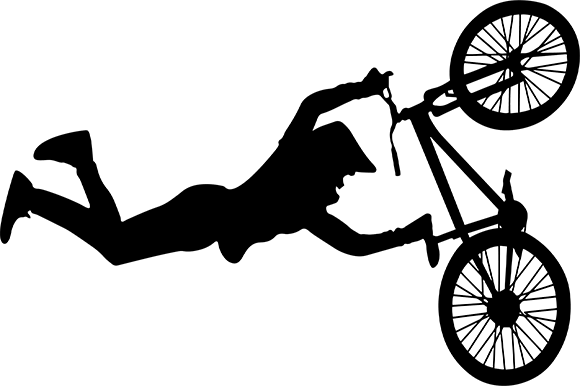
The mood of Downhill 3 Bike is energetic and rugged. Unlike overly ornate floral patterns or delicate script fonts, this design relies on bold shapes and clear negative space. For an embroidery designer, this is often a sweet spot. It suggests a layout that can translate well into a fill stitch for the main body of the bike and rider, potentially accented with satin stitch borders if the digitizer has included them or if you plan to re-digitize for a specific machine. The visual personality here is modern and sporty, making it a natural fit for custom apparel targeting outdoor enthusiasts, mountain biking clubs, or adventure-themed boutiques.
I immediately thought about how this would look as a left-chest logo on a fleece jacket or a large back print on a hoodie. The simplicity of the vector source files—specifically the .svg and .eps formats mentioned in the package—means the scaling is limitless without pixelation. However, as an embroiderer, I know that "scalable" in vector land doesn't always mean "stitchable" at any size. You still need to respect the physical limitations of thread and fabric. But having those clean vector lines as a reference gives me confidence that the proportions are solid before I even open my digitizing software or load a pre-made embroidery file.
Real-World Application: The Weekend Warrior Sweatshirt
Let's walk through a real case scenario. Imagine a client runs a small shop selling gear for local trail groups. They want a signature item for their upcoming season launch. They choose a heavyweight cotton-blend sweatshirt in charcoal grey. This is where Downhill 3 Bike shines. The dark fabric provides a perfect canvas for high-contrast thread colors. I'd envision using a bright safety orange or electric blue for the bike frame to make it pop against the grey, perhaps with a neutral white or silver for the rider's helmet.
In this context, the design acts as more than just decoration; it becomes a badge of identity. When a customer sees that sharp, stitched silhouette on a sweatshirt embroidery project, they instantly recognize the craft quality. It elevates the garment from generic merchandise to a handmade product with value. The clean lines of the illustration ensure that even from a distance, the subject matter is clear. There is no visual clutter to confuse the eye, which is crucial for branding. If this were being used for an embroidered patch, the bold outlines would define the edge perfectly, allowing for a merrow border or a clean cut-edge finish depending on the desired aesthetic.
Navigating Fabric Textures and Technical Challenges
While the design is strong, practical application requires caution. Not every surface is created equal. If you are planning to use Downhill 3 Bike on a tote bag design, you need to consider the weave of the canvas. Heavy canvas can sometimes cause small details to get lost if the stitch density isn't adjusted. Conversely, if you are aiming for baby embroidery on a soft onesie, the stiffness of a dense fill stitch might be uncomfortable against sensitive skin. In such cases, you might need to reduce the density or switch to a lighter running stitch outline if the design allows, ensuring the finished product remains soft and wearable.
Curved surfaces present another hurdle. Putting this on a cap is a popular choice for sports teams, but the front panel of a hat is notoriously tricky. The downward slope of the brim meets the vertical front panel right where the bike tires might sit. If the design is too wide or sits too low, the needles could hit the brim, causing skipped stitches or broken needles. Always measure your hoop size capabilities against the dimensions of the design. Furthermore, stretchy fabrics like performance jerseys require a robust stabilizer. Without proper backing, the dynamic angles of the bike could distort during washing, making the rider look like they are melting rather than racing.
Enhancing Brand Value and Customer Trust
For Etsy sellers and creative entrepreneurs, the clarity of a design directly impacts perceived value. A blurry or poorly stitched graphic signals low effort, whereas a crisp, well-executed machine embroidery design builds trust. Downhill 3 Bike offers that professional edge. When used in commercial embroidery projects, consistency is key. Because the source files are vectors, you can ensure that every item you produce—from aprons to pillow covers—maintains the exact same proportions. This consistency helps in building a recognizable brand identity.
Think about the unboxing experience for a customer buying a personalized gift. If they order a kitchen towel with this biking motif for a husband who loves trails, the tactile feel of the stitching adds a layer of luxury that printed ink cannot match. The raised texture of the threads invites touch. It turns a simple utility item into a keepsake. This emotional connection is what allows makers to charge a premium for their small shop product listings. The design itself is the hook, but the quality of the execution is what secures the five-star review.
Practical Notes for the Studio
Before committing to a full production run, I always advise running a test. Even with high-quality design assets, variables change. Here is my checklist for integrating Downhill 3 Bike into your workflow:
- Scrap First: Always stitch out on a scrap piece of the actual fabric you intend to use. This reveals how the material interacts with the thread tension.
- Color Contrast: Test the design in black and white mockups first to ensure the shape holds up without relying on color differentiation. Then, experiment with thread palettes that suit your specific brand.
- Density Check: Inspect the stitch count visually. If areas look too solid, they might cause puckering. If they look too sparse, the fabric might show through awkwardly.
- Licensing Verification: The product description notes you receive vector files (.svg and .eps). It is vital to confirm if these are intended for cutting machines only or if they come with a corresponding embroidery license. Do not assume you can sell finished items digitally or physically without checking the specific terms provided by the creator.
- Stabilizer Selection: Match your stabilizer to the fabric weight. A heavy design on a light fabric needs a cut-away stabilizer to prevent sagging over time.
Ultimately, Downhill 3 Bike is a versatile graphic that bridges the gap between digital art and tactile craft. Whether you are creating holiday embroidery gifts for the family or stocking inventory for a boutique, its clean lines and action-oriented theme offer a reliable foundation. By respecting the technical nuances of embroidery and pairing this strong visual with quality materials, you can create products that stand out in a crowded market. It is a reminder that great designs are not just seen; they are felt, worn, and cherished.